Applesauce Cake

IMG_3639[1]

This cake was inspired by old drama series The Waltons. How many of you used to watch it in the good old days when Ireland had only two TV channels? The Mom, Olivia Walton always made Applesauce Cake and here is my version of it. You can omit the sliced apple if you like but it does add to the flavour of the cake. This cake also works well using Gluten Free flour. Enjoy!

250 grams/2 cups plain flour (all purpose flour)

1 teaspoon baking soda

½ teaspoon nutmeg

1 teaspoon cinnamon

½ teaspoon salt

113 grams /1 stick butter/ 4 ounces butter

225 grams /1 cup granulated sugar

100 grams/ ½ cup light brown sugar

4 large eggs at room temperature

375 grams/ 1 ½ cup homemade apple sauce unsweetened

1 small eating apple peeled and sliced

Applesauce

500 grams /1 pound Bramley apples peeled, cored and sliced

60 millilitres water 1/4 cup water

Place apples and water into  a large bowl and microwave on high for between 5 and 10 minutes until apples are soft and pulpy. Break up any stubborn pieces with a fork. you can also do this on the hob but take care that the apples do not burn.


Preheat oven to 180°C/350°F.

Spray your loaf pan with cooking spray.

Sift flour, salt, baking soda and spices into a bowl and set aside.

Cream butter and sugars in your mixing bowl until fluffy. Add the eggs one at time until incorporated. With the mixer on low, add all of the applesauce followed by the flour mixture.

Pour batter into your prepared loaf pan. Place the apple sliced on top tucking some into the batter.

Bake for 45-50 until an inserted skewer comes out cleanly.

Make this cake gluten free by substituting the flour and baking powder with a GF variety. I like Dove’s Farm brand. Remember to include ¼ teaspoon of Xanthan gum.

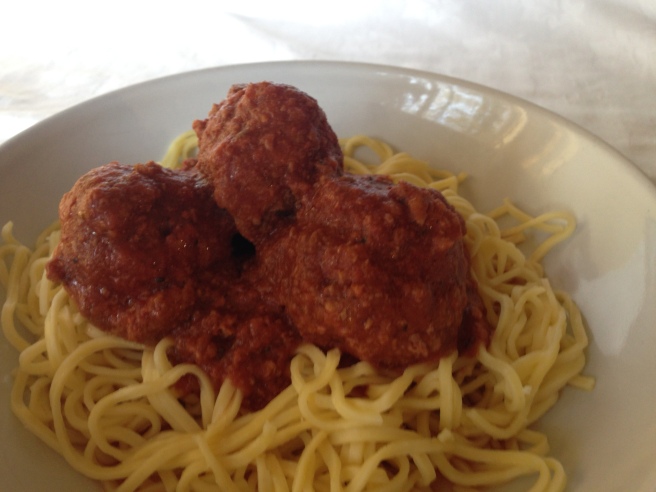
Italian Meatballs

IMG_3608

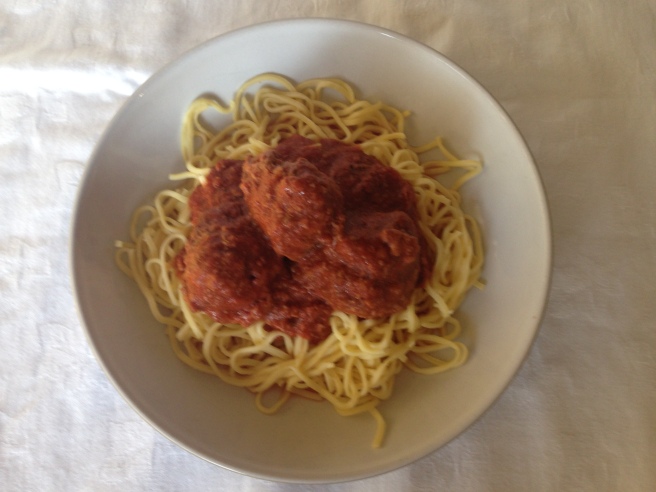
These were my next experiment in the slow cooker. All the ingredients were from our local Aldi, as was the slow cooker! We had dinner for under €10 which was a big success with everyone. I have included more traditional ways of cooking your meatballs which will be just as tasty.

IMG_3609

500 grams / 1 pound minced beef (ground beef)

500 grams/ 1 pound minced pork (ground pork)

½ cup grated parmesan cheese

4 tablespoons tomato ketchup or Ballymaloe Relish

45 grams /½ cup/ 1.6 ounces bread crumbs (optional)

½ teaspoon dried oregano

1 egg

Fresh Spaghetti to serve

Combine all the ingredients in a bowl and mix well. You can also include minced garlic and onion but I think these need to be cooked and cooled before adding them to your mince meat   I use a muffin scoop so that the meatballs are evenly sized but you can also use your hands. Wet them first so that the meat won’t stick to you. There are a couple of ways that you can cook these

  1. Brown the meatballs in a pan on your hob, add the tomato sauce and allow to simmer slowly until the meatballs are cooked through
  2. Cook off the meatballs in your oven and cook off the tomato sauce on the hob. Pour sauce over meatball when serving. I sometimes do this method as my youngest is fussy and wants just meatballs and pasta with no sauce!
  3. Slow cooker! We did this last week for the first time and it was a big success. I placed all the meatballs into the bottom of the slow cooker and added the tomato sauce ingredients on top without cooking it first. I cooked it on high for 5-6 hours and the result was delicious. Very tender meatballs in sauce that everyone ate!

My simple tomato sauce

2 packets of Aldi Passata

½ teaspoon dried basil

½ teaspoon dried oregano

1 teaspoon sugar

Combine all the ingredients in a saucepan and simmer over a low heat for 10 minutes. I sneak in puréed vegetables such as carrot or courgette (zucchini) too for a veggie hit.

If you want to make this dish gluten free, omit the breadcrumbs or use gluten free ones instead. I have made these without breadcrumbs and with gluten free crumbs and they are fine either way.

Boeuf Bourguignon

I’ve just purchased a slow cooker and this was the first dish I cooked in it. It was divine and everyone ate it. The meat was cooked on high for 6 hours and was very tender. You can also do this in the oven if you don’t have a slow cooker in a covered casserole. I used cornflour instead of plain flour so that the dish would be gluten free.

The same techniques works well with venison but add Guinness instead of red wine and also add a handful of stoned prunes.

IMG_3596[1]

175grams/ 6 ounces streaky bacon rashers

1-2 teasp olive oil

900grams/ 2lb braising steak cut into 4cm (1 ½ inch) cubes

12 small shallots – I used a red onion

1 tablespoon cornflour

300 millilitres/ 1 ¼ cup / 10 fl ounces Beaujolais or other red wine

300 millilitres/ 1 ¼ cup / 10 fl ounces beef stock

115grams / 4ounces button mushrooms

1 Bay leaf

1 teaspoon Herbes de Provence -I just used parsley

Salt and freshly ground black pepper

Mashed potatoes to serve

Method:

Preheat the oven to 160C/325F

Fry bacon until lightly browned, drain on kitchen paper and transfer to casserole

Fry beef in batches to brown

Reduce the heat to medium and fry off the shallots

Transfer to casserole with a slotted spoon and stir the cornflour into the remaining fat of the frying pan. If the pan is dry mix the cornflour with a little wine or stock. Pour the wine and stock and bring to the boil stirring constantly until smooth.

Add the mushroom and bay leaf and dried herbs. Season to taste with salt and pepper and pour the contents of the pans over the meat and shallots in the casserole. Cover and cook for two hours in the oven until the meat is very tender.

If you are using a slow cooker you can brown the meat if you wish and simply place all the ingredients into the slow cooker and turn it on. I wouldn’t add the cornflour, use a slurry instead when the dish is cooked

If your sauce is still too runny add a slurry of a tablespoon of cornflour and 2 tablespoons of water to the dish and whisk in and your sauce will thicken. I also used a tablespoon of gravy browning to darken my sauce in case the kids were suspicious about the colour!

Garnish with chopped parsley and serve with mash

Chocolate and Pumpkin Muffins

Not to be defeated by the lack of canned pumpkin purée, here in Ireland I decided to make my home pumpkin purée. I mean how hard it could be? I have many years of puréeing baby food for fussy eaters under my belt! The result was amazing and all those yummy recipes with canned pumpkin were no longer out of my reach! Of course my kids don’t really know there is pumpkin in these muffins we just call them Hallowe’en muffins and they are a big success! The pumpkin spice recipe too is easy to follow and will keep forever. Enjoy!

IMG_3588[1]

Ingredients

218 grams/ 1 ¾ cups plain flour (all purpose)

1 teaspoon baking soda

1 teaspoons cinnamon

½ teaspoon pumpkin spice (recipe follows)

½ teaspoon salt

2 eggs

150 grams/ 3/4 cup sugar

330 grams /1 ½ cups pumpkin purée (recipe follows)

110 grams/ ½ cup brown sugar

125 millilitres /½ cup sunflower oil

125 millilitres/½ cup milk

175 grams/1 cup chocolate chips

Method

  1. Preheat oven to 180°C/350°F.
  2. Mix together the dry ingredients: flour, baking soda, cinnamon, pumpkin spice and salt in a bowl.
  3. In a separate bowl, mix together eggs, sugar, brown sugar, pumpkin puree, vegetable oil and milk until smooth.
  4. Add dry ingredients to wet ingredients and stir until they are combined.
  5. Stir in chocolate chips.
  6. Use muffin liners and using a muffin scoop fill each about 3/4 of the way.
  7. Bake for 18 minutes. Check muffins are cooked when an inserted skewer comes out clean.

Pumpkin Spice

Ingredients:

3 tablespoons ground cinnamon,

2 teaspoons ground ginger,

2 teaspoons ground nutmeg,

1 ½ teaspoons ground allspice

1 teaspoon ground cloves.

Method:

Mix the spices together in a small bowl and Store the mixture in a clean small jar

Adapted from Betty Crocker

Homemade Pumpkin Purée

Ingredients:

1 medium baking pumpkin

Method:

Preheat oven to 180°C/350°F

Place pumpkin on a parchment lined baking sheet and place into oven. Bake until a knife can easily be inserted into the skin of the pumpkin, about 1 hour. If the knife cannot be inserted easily continue baking in 15 minute increments.

Remove the pumpkin from the oven and allow to cool for about 30 minutes.

Slice the pumpkin in half with a knife, and then scoop out the seeds and membrane from the inside of the pumpkin, saving the seeds for roasting if you like.

Scoop out the soft pumpkin flesh with a large spoon and place into blender and purée.

Strain to remove any remaining stringy pieces and store in an airtight container in the refrigerator for up to three days or in the freezer for several months.

Saucy Sauces

We eat a lot of chicken in our house and  I mean a lot, so it makes a change to have a variety of sauces that will even  change the humble chicken goujon  into something even more appetising!

The Perfect Orange sauce
IMG_3476[1]

I have searched for years for the perfect orange sauce and this is it! The addition of lemon juice really brings out the citrus flavour! It’s great over chicken and pork. You can now even attempt the classic duck a la orange and impress your family and friends. Freshly squeezed orange juice is great in this recipe but you can cheat too by using regular store bought orange juice. This recipe is super fast if you have cup measures so think about investing in some!

½ cup/ 100g grams of white sugar

¼ teaspoon salt

3 tablespoons cornflour (cornstarch)

1 ¼ cups/ 300millilitres of orange juice

¼ cup/ 60 millilitres lemon juice ½ cup water

1 tablespoon butter

1 tablespoon each of grated orange and lemon zest (optional)

In a saucepan mix all your dry ingredients, then stir in your juice and water. Cook over a low heat stirring constantly until the mixture boils. Allow to boil for about three minutes.  Add the tablespoon of butter to get rid of the scum. Any leftover sauce can be frozen!


Pesto Cream Sauce

This sauce was served to us in a restaurant on holiday this summer with fresh tuna. The chef was reluctant to part with his recipe but I am glad that I eventually persuaded him as it has become a much asked for sauce in our house! I serve it with chicken and with pasta.

Fresh Pesto

2 cups/ about 70 grams fresh basil leaves, packed

½ cup/50 grams freshly grated Parmesan Reggiano cheese

½ cup/120 millilitres extra virgin olive oil

1/3 cup/ 45 grams pine nuts roasted (pignoli)

3 garlic cloves minced, about 3 teaspoons – adjust to your taste

Salt and freshly ground pepper

Heat a small frying pan over a low heat; cook the pine nuts until golden shaking occasionally. Place the basil leaves and pine nuts into a food processor and blitz, then add garlic and cheese and blitz again. Scrape down the sides and slowly add the olive oil in a steady stream to emulsify your pesto. Stir in some salt and pepper to taste. It will keep in the fridge for two weeks.

For the Pesto Cream

IMG_3525[1]

Use your fresh pesto (above) or cheat by using store bought pesto from the chilled section.

Allow 1 heaped teaspoon and¼ cup/ 60 millilitres of cream per person.

Cook off the pesto in a saucepan until you can smell the garlic, about 30 seconds, then add the cream and bring to a boil whisking continuously. As soon as its boils reduce the heat and allow it to reduce to create a pouring sauce consistency.


Vermouth and Tarragon Cream

IMG_3532[1]

This is adapted from Nigella’s Tarragon Chicken. Tesco stock Vermouth here in Cork and I use Vermouth Bianco.  You can make yourself a Manhattan cocktail while you cook. This is great served with chicken!

½ cup/120 millilitres of vermouth or white wine

½ cup/120 millilitres cream of cream

2 good sized spring onions, thinly sliced (scallions)

Olive oil

1 clove of garlic chopped finely

½ teaspoon freeze dried or dried tarragon

Fresh tarragon chopped to serve – optional

Fry off the garlic, tarragon and spring onions over a medium heat in the olive oil making sure it doesn’t burn. Add the vermouth and allow to bubble up to burn off the alcohol, then add the cream and bring to a boil whisking continuously. As soon as its boils reduce the heat and allow it to reduce to create a pouring sauce consistency.

Baked Ham

IMG_3464[1]

Do you ever get tired of deli ham? This is an easy recipe to cook your own succulent ham to use for sandwiches in your kid’s lunch boxes. Alternatively, it makes a tasty dinner if you serve it with potatoes and vegetables. It’s even posh enough for your Christmas ham! My friend Teresa gave me the idea of using maple syrup for the glaze as previously I used honey.

1 pale ham unsmoked – I used a 2 kilogram in this recipe, just increase the amount of cider if ham is bigger

1 can/500 millilitres of your favourite cider I used Bulmer’s apple Cider

Glaze

1/3 cup/5 tablespoons/ 75 millilitres Dijon mustard

½ cup/8 tablespoons/125 millilitres maple syrup

2 tablespoon brown sugar

Remove all packaging from the ham and soak overnight in cold water to get rid of excess salt. For a Christmas ham I would change the water at least once.

Drain off the water and pat the ham dry with a paper towel. Place ham in an oven proof dish with deep sides. Pour the entire can of cider over the ham and bake using the guide lines below. Don’t let the cider cook off, so maybe have a second can ready just in case!

Calculate your cooking time 20 -25 minutes per lb/450 grams in an oven heated to 180°C/350°F or until your internal temperature is 80°C /176°F

While ham is cooking mix together the ingredients for the glaze in a jug and use this to glaze your ham in the last thirty minutes of cooking time.

Don’t discard the juices left in the bottom of the pan, use them to a make a tasty gravy using cornflour and gravy browning or even gravy granules.

Pizza Rolls

IMG_3466[1]

My kids love pizza, so I thought it could make a great lunch box item. Unfortunately, regular pizza becomes hard and unpalatable when it has sat in a lunch box all day, that’s when I experimented with these rolls.  They  stay soft  because they are rolled as you would  with a  cinnamon roll. Needless to say they were a big hit. I used strong wholemeal flour but by all means use strong white flour if you prefer.

500 grams / 4 cups wholemeal strong flour

½ teaspoon salt

1 x 7 gram packet / 1 ½ teaspoons yeast

2 teaspoons sugar

2 tablespoons extra virgin olive oil

325 millilitres /1 1/3 cups lukewarm water (10 US ounces or 11 Imperial ounces)


Toppings

My simple Pizza Sauce recipe – below

Mozzarella Cheese


I use my mixer with a dough hook and add all the ingredients together and mix for 5 minutes. If you don’t have a mixer you can also do this by hand:

Mix the flour, salt, sugar and dried yeast together in a large mixing bowl. Make a well in the centre and add the oil and water

Gradually work in the flour to make a soft dough. This can take 10 minutes by hand but about 5min with a dough hook. The dough should have a smooth texture which can be stretched without tearing. Put into a greased bowl and cover with cling film for 30- 60 min until doubled in size.

Remove dough from bowl. Divide into three equal parts. Take one portion of the dough and roll out on a lightly floured surface. Roll dough into a rectangle shape as you would for cinnamon rolls.

Once your dough is rolled, you can begin assembling your pizza rolls starting with the sauce. Spread sauce over the dough leaving the edge of one of the long sides of the rectangle free from sauce so the edge will seal when rolled up. Layer meat, cheese and any other pizza toppings you’d like. I used mozzarella cheese and ham, but use your favourite toppings. Do cut the toppings a little smaller than you normally would as it is less messy whrn you come to cutting the uncooked dough

After all your pizza toppings have been added, begin rolling up the dough starting at the long side of the rectangle where the sauce is all the way to the edge – you want to leave that sauce free edge to be rolled up last. Roll all the way up and then pinch the edges to seal.  I used a large knife to slice off equal sized rolls but believe it or not dental floss works well too!

Place rolls in a greased baking dish. Cover and allow buns to rise for 30 minutes. Bake in the oven at 180°C/350°F for 25 – 30 minutes or until golden brown. They take a little longer than regular pizza as they are rolled up. They freeze well.


My simple pizza sauce

1 400grams/14ounces can of chopped tomatoes or 1 jar of smooth passata

½ teaspoon dried basil

½ teaspoon dried oregano

1 teaspoon sugar

Combine all the ingredients in a saucepan and simmer over a low heat for 10 minutes. Allow to cool before putting on your pizza base. This sauce will keep in the fridge for three days

Lemon, Ricotta and Chia Seed Muffins

IMG_3462[1]

There is no better way wake up call than the scent of freshly baked muffins wafting through the kitchen especially when you have added Chia seeds, the new super food to a tangy lemon drizzle recipe. Chia seeds grow natively in South America and were an important food for the Aztec and Mayan Cultures; in fact Chia is the ancient Mayan word for “strength.” They are loaded with antioxidants, fibre and omega 3 and are easily incorporated into your food. Sprinkle them on yoghurt or porridge or include the in baked goods.They are widely available in your local store. This is an easy recipe; you don’t even need a mixer and the muffins can easily be made gluten free by substituting the flour. Enjoy!

375 grams /2 ½ cups plain flour (All purpose)

220 grams/1 cup caster sugar (superfine)

2 teaspoons finely grated lemon ring (I used 2 lemons)

60 grams/ 1/3 cup black chia seeds plus extra for sprinkling

200 grams / 1 cup fresh ricotta

2 eggs lightly beaten

2 teaspoons vanilla extract

280 grams/ 1 cup plain yoghurt

125 millilitres/ ½ cup sunflower oil

Lemon drizzle icing – optional

160 grams/1 cup icing sugar

1 ½ tablespoons lemon juice


Preheat the oven to 180°C/350°F.

Place the flour, sugar lemon rind and chia seeds in a large bowl and mix to combine. Add the ricotta, eggs, vanilla yoghurt and oil and using a spoon, mix until just combined. If you over mix the muffins will be tough.

Spoon the mixture into a muffin pan that you have lined with paper cases.  Alternatively you can grease your muffin pan well with spray oil or butter and avoid using the paper cases. I used an ice-cream scoop to divide the mixture evenly into the pans.

Cook for 20-25 minutes or until cooked when tested with a skewer. Allow to cool in the pan for a couple of minutes before transferring to a wire rack to cool completely.

To make the lemon drizzle icing, place the sugar into a bowl, add lemon juice and whisk to combine. You may need extra juice but add about a half teaspoon at a time or your icing will be too runny. Sprinkle the muffins with the extra chia seeds and drizzle the muffins with the icing using a small spoon.

This batch made 16 when I used the muffin scoop which is about the right portion for a lunch box.

These muffins freeze well but don’t add the extra seed or icing if you intend to do so.

Make these muffins gluten free by substituting the flour and baking powder with a GF variety. I like Dove’s Farm brand. Remember to include ¼ teaspoon of Xanthan gum.


Recipe adapted from Donna Hay Magazine June/July Edition 2015

Apple Cinnamon Loaf

IMG_3427[1]

This is a delicious loaf for lunch boxes now that we are back to school. It is also good as a  muffin but just cook for 15-18 minutes . Don’t be tempted to use store bought chunky apple sauce as it is too wet. I have a great recipe for applesauce cake which I will post at a later date. I used Pink Lady apples but Granny Smiths work well too as they hold their shape when bake.

Sliced apples are great in lunch boxes and to prevent them going brown soak them in 7UP or lemon juice diluted with water for a couple of minutes. Seal in an air tight plastic container or zip lock bag and your child will enjoy fresh apple for their fruit break.

Topping

67 grams/ 1/3  cup brown sugar

1 teaspoon cinnamon

Cake Batter

134grams / 2/3 cup white caster sugar

113 grams/4 ounces /½ cup butter

2 eggs

1 teaspoon vanilla extract

188 grams /1 ½ cups flour (all purpose)

1 ¾ teaspoons baking powder

120 millilitres/ 4 ounces/ ½ cup milk

1 apple peeled and diced (I used Pink Lady)

Method

Preheat the oven to 180°C/350°F. Line a 2 pound loaf tin approximately 9 by 5 inches with baking parchment.

Mix the brown sugar and cinnamon together in a small bowl and set aside.

Beat the white sugar and butter together until creamy and then add the eggs and vanilla until incorporated.

Stir in the flour and baking powder on a low speed and finally add the milk and mix until you have a smooth batter.

Pour half the batter into the lined tin and add half the apples and half the cinnamon sugar. Pour the remaining batter over the apple layer. Add the remainder of the apples followed by the remainder of the cinnamon sugar. Lightly pat the apples in to the batter and swirl with a skewer.

Bake for 35 -45 minutes until your skewer comes out clean.

Make this cake gluten free by substituting the flour and baking powder with a GF variety. I like Dove’s Farm brand. Remember to include ¼ teaspoon of Xanthan gum.

Chocolate Celebration Cake

IMG_3305[1]

This cake is fabulous for birthdays or simply because it is a chocolate lover’s dream. It is moist yet light because the recipe calls for oil rather than butter.  I have decorated this one with fresh fruit in the style of the cake on the Great British Bake Off opening credits, but feel free to adapt it. This cake works well as a gluten free option in fact you can’t even tell the difference. I use the Tesco brand of cocoa as it is even more chocolately than other brands.

Ingredients

400 grams / 2 cups caster sugar

218 grams/ 1 ¾ cups plain flour (all purpose)

85 grams /  cup cocoa sieved

1 ½ teaspoons baking powder

1 ½ teaspoons baking soda

1 teaspoon salt

2 eggs

1 cup milk

¼ cup vegetable or sunflower oil

2 teaspoons vanilla extract

235 millilitres /1 cup boiling water

Method

  1. Heat oven to 180°C/350°F. Grease and line two 22 centimetre/ 9 inch round baking pans.
  2. Stir together sugar, flour, cocoa, baking powder, baking soda and salt in large bowl. Add eggs, milk, oil and vanilla; beat on medium speed of mixer for two minutes. Stir in boiling water creating a thin batter. Pour batter into prepared pans.
  3. Bake 30 to 35 minutes or until wooden pick inserted in centre comes out clean. Cool for 10 minutes before removing from pans to wire racks. Cool completely.

Chocolate Buttercream Frosting

113 grams / ½ cup /1 stick or butter

75 grams /   cup   cocoa sieved

330 grams / 3 cups powdered sugar

80 millilitres/  cup milk

1 teaspoon vanilla extract

  1. Melt butter. Sieve cocoa. Add the icing sugar, cocoa, butter, vanilla and milk to a mixer bowl and beat to spreading consistency.
  2. Add small amount additional milk, if needed.


You can also make this as a one pan cake; I use a 20cm/8inch and bake it for about 50 minutes at 180°C/350°F.

Make this cake gluten free by substituting the flour and baking powder with a GF variety. I like Dove’s Farm brand. Remember to include ¼ teaspoon of Xanthum gum.

Adapted from Hersey’s Perfectly Chocolate Chocolate Cake